When setting up a Shopify store, you have to enter the store name. There are practically two elements that can be referred to as the store names. The first one is the store name which is visible to your customers on the frontend. Second is the domain name which by default ends with “myshopify.com”. This guide will walk you through changing both of them.
Need help? Let us know if you still have problems or would instead leave this on professional. Our team will happily do all the "hard" work for you, including connecting your custom domain and setting up an SSL certificate.
How to change the store's name
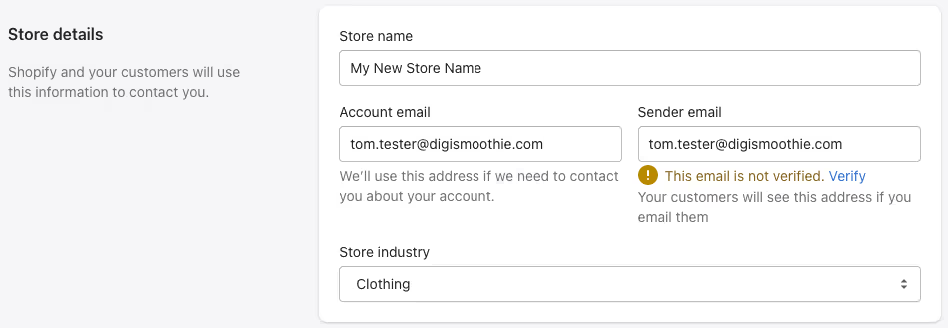
Changing the store name which is visible to your customers is really easy and can be done from your store admin. In order to change your Shopify store name, simply follow the steps:
- Go to your store admin > Settings > General (i.e. https://your-store.myshopify.com/admin/settings/general)
- In the section “Store details” update the “Store name” field
- Click on the “Save” button—and that’s it, your store is updated immediately
How to change the store's domain name (URL)
If you would like to change your store domain name (i.e. your-store.myshopify.com), that’s unfortunately not that simple and requires some extra steps including setting up a new account.
First, you need to define what exactly you would like to change. Is it the store URL that is visible to your customers? Then you actually don’t need to change the “myshopify.com” name but only add a new domain to your store and use it as primary. You can either use an existing one which you already own or buy a new one.
To do so, simply follow the steps:
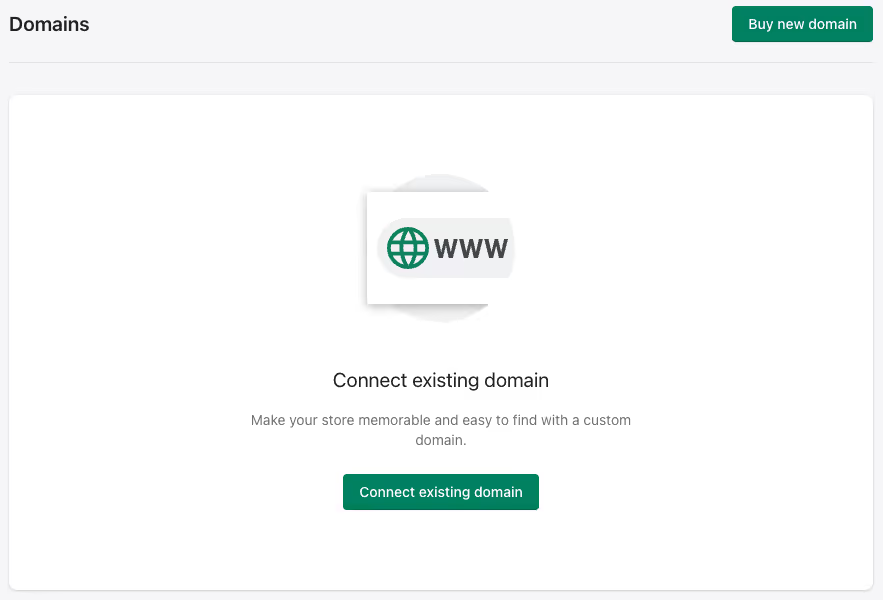
- Go to your store admin > Settings > Domains (i.e. https://your-store.myshopify.com/admin/settings/domains)
- If you don’t have a domain yet click on “Buy new domain” to get one. Shopify costs are $14 per year for the .com domain which is a good price (GoDaddy is $13 for the first year). It doesn’t make sense to get the domain elsewhere due to the hassle of transferring/connecting it to your store
- Once you go through the purchase process you should see the new domain in the domain list. Click on the “Change primary domain” link and select the new domain
- Click on “Save”—and that’s it. Your store URL should be now the URL address of the new domain. Please note the original “myshopify.com” will still work and redirect all traffic to the new domain

How to connect or transfer existing (sub)domain
If you would like to connect or transfer an existing domain, or use a custom subdomain follow the steps below:
- Go to your store admin > Settings > Domains (i.e. https://your-store.myshopify.com/admin/settings/domains) and click on "Connect existing domain"
- Login to your domain registrar (i.e., GoDaddy, Namecheap) and update the domain A record to point to Shopify’s IP address 23.227.38.65
- Change the www CNAME to shops.myshopify.com. If you are using subdomain use [subdomain]-shops.myshopify.com where [subdomain] is the actual subdomain name. For example, for connecting subdomain test.digismoothie.com you need use test-shops.myshopify.com
- Once done, click on the “Verify connection” button to make sure all is ready. Please keep in mind that DNS changes can take a few minutes/hours to propagate
- After the domain is connected or transferred to your account, continue from step 3 above to change the primary domain.
How to change myshopify.com name (URL)
The default “myshopify.com” domain can be changed only once. You can do so by going to your store admin > Settings > Domains and clicking on the link "Change to a new myshopify.com domain."
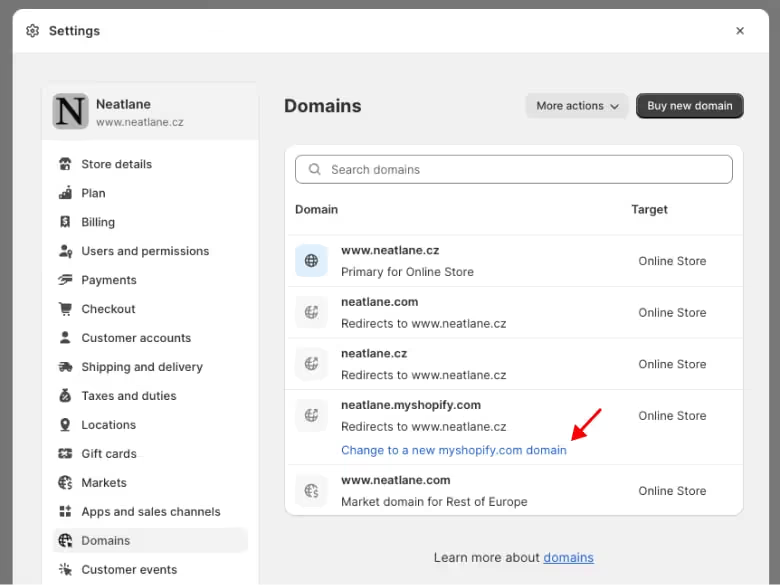
Once clicked you will be prompted to enter your new myshopify.com domain. After you add the new domain, it will automatically redirect to your primary domain.
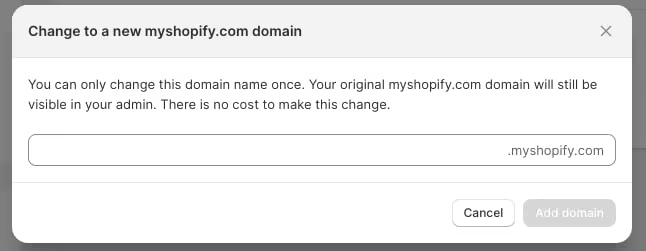
But if you add a custom domain as described above, your customers will actually never see the myshopify one. To find out what's your myshopify.com domain, see our article on finding default domain & store URL.
If for some reason you really need to change it, the only way is to set up a new store and use the new name. You can also duplicate the existing store to the new one using a native way or third-party app like Rewind Copy.
How to use a separate domain for selected market(s)?
If you use multiple markets (and languages), you can choose a different URL for each. Basically, you have three options:
- Use subfolders – for example, www.mystore.com/en for English and www.mystore.com/de for German
- Use subdomain – www.mystore.com for English and de.mystore.com for German
- Use separate domains – www.mystore.com for English and www.mystore.de for German
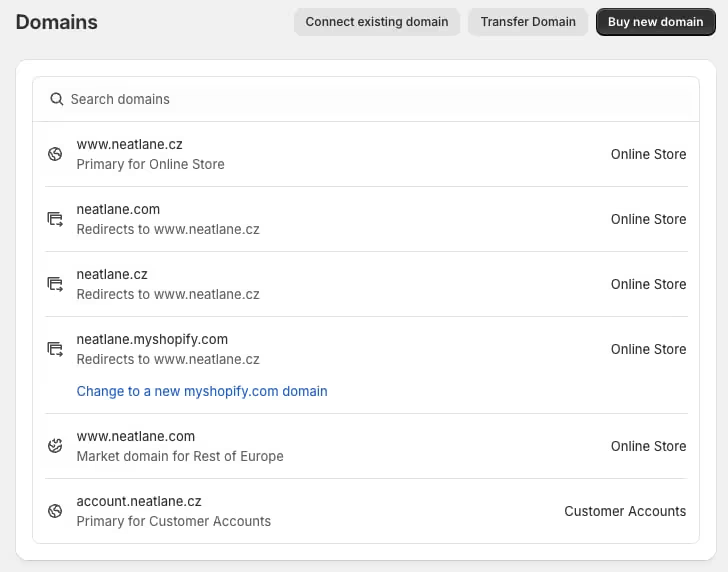
From the SEO perspective, using subfolders is probably the best option because all your backlinks will lead to a single domain.
However, using a local domain can boost your brand trust and overall conversion. Especially in some regions like Germany, France, or Japan, which are more sensitive to perfect localization.
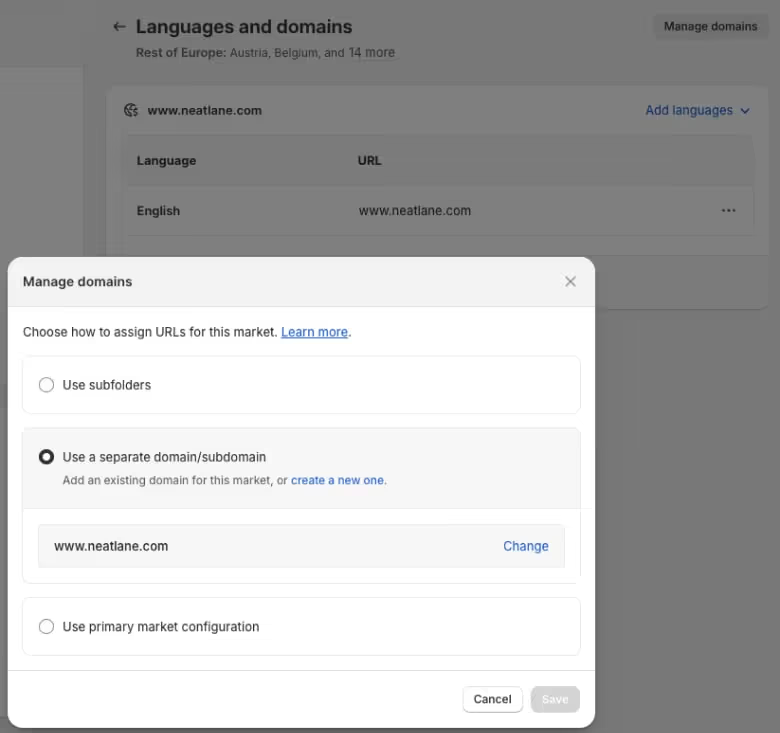
Here's how to connect a separate domain for the selected market(s):
- Go to store admin > Settings > Domain > Connect existing domain
- Follow the instructions until the domain is ready in your domain list
- Go to Settings > Markets > select a desired market and click on "Languages and domains"
- Click on Manage domains > Use a separate domain/subdomain and select the local domain from the list
The only limitation is that you can use the custom domain only for one market. So if you have a market for Germany and use a custom domain, www.mystore.de, you can't use this specific domain for any other market.
The workaround is to group your markets by language and set "Show prices to customers in their local currency," which essentially gives you the desired setup.
Need help? Let our team deal with your domain issues
Let us know if you still have problems or would instead leave this on professional. Our team will happily do all the "hard" work for you, including connecting your custom domain and setting up an SSL certificate.


